How to Install Solar Panels in Singapore: Step-by-Step Guide for Landed Homes
The complete step-by-step process for installing solar on a Singapore landed home, from free site survey to switch-on. Typically 4 to 12 weeks, most of it SP Group's timeline, not yours.
The quick answer: Installing solar on a Singapore landed home follows six clear stages: (1) free site survey, (2) system design and proposal, (3) contract and regulatory submissions, (4) physical installation on the roof, (5) SP Group inspection and metering, and (6) switch-on and monitoring. The whole journey typically takes 4 to 12 weeks from installation start to full commissioning. The rooftop work itself is only a few days to about two weeks, most of the calendar time is SP Group's connection and metering process, which no installer controls. As a homeowner you handle very little; a good installer manages the approvals and paperwork for you.
Before you start: what to have ready
Two things make the process smooth from day one: a recent SP Group electricity bill (so your consumption can be read accurately) and a rough sense of your goals, whether you want to cover most of your bill, add battery backup later, or plan for an EV. Everything else is the installer's job. Here is the full sequence.
Step 1: Free site assessment
A solar engineer visits your home to check what really matters: roof orientation and pitch, usable unshaded area, shading from trees or neighbouring buildings, structural condition, and your existing electrical setup. Satellite estimates are a starting point, but only an on-site survey gives an accurate design. Rezeca conducts these assessments at no cost. This is also when your roof type and any structural considerations are noted.
Step 2: System design and proposal
From the survey, you receive a tailored design: panel model and count, inverter type, mounting method for your roof, expected annual generation, and a clear financial picture, cost, estimated savings, and payback. This is where how many panels your roof needs becomes a specific number rather than a range. Take the time to compare proposals properly; our guide on choosing a solar installer covers what to look for and what red flags to avoid.
Step 3: Contract, then regulatory submissions
Once you sign and approve the design, your installer's Licensed Electrical Worker (LEW) handles the submissions. For a typical landed home this means the electrical application to SP Group and registration under the Simplified Credit Treatment (SCT) scheme so you are credited for exported solar. URA, BCA or SCDF only come into play in specific cases (a conservation property, a significant structural load, or a battery), and EMA licensing does not apply to a home-sized system. You generally file nothing yourself. The full picture of who approves what is in our solar approvals guide.
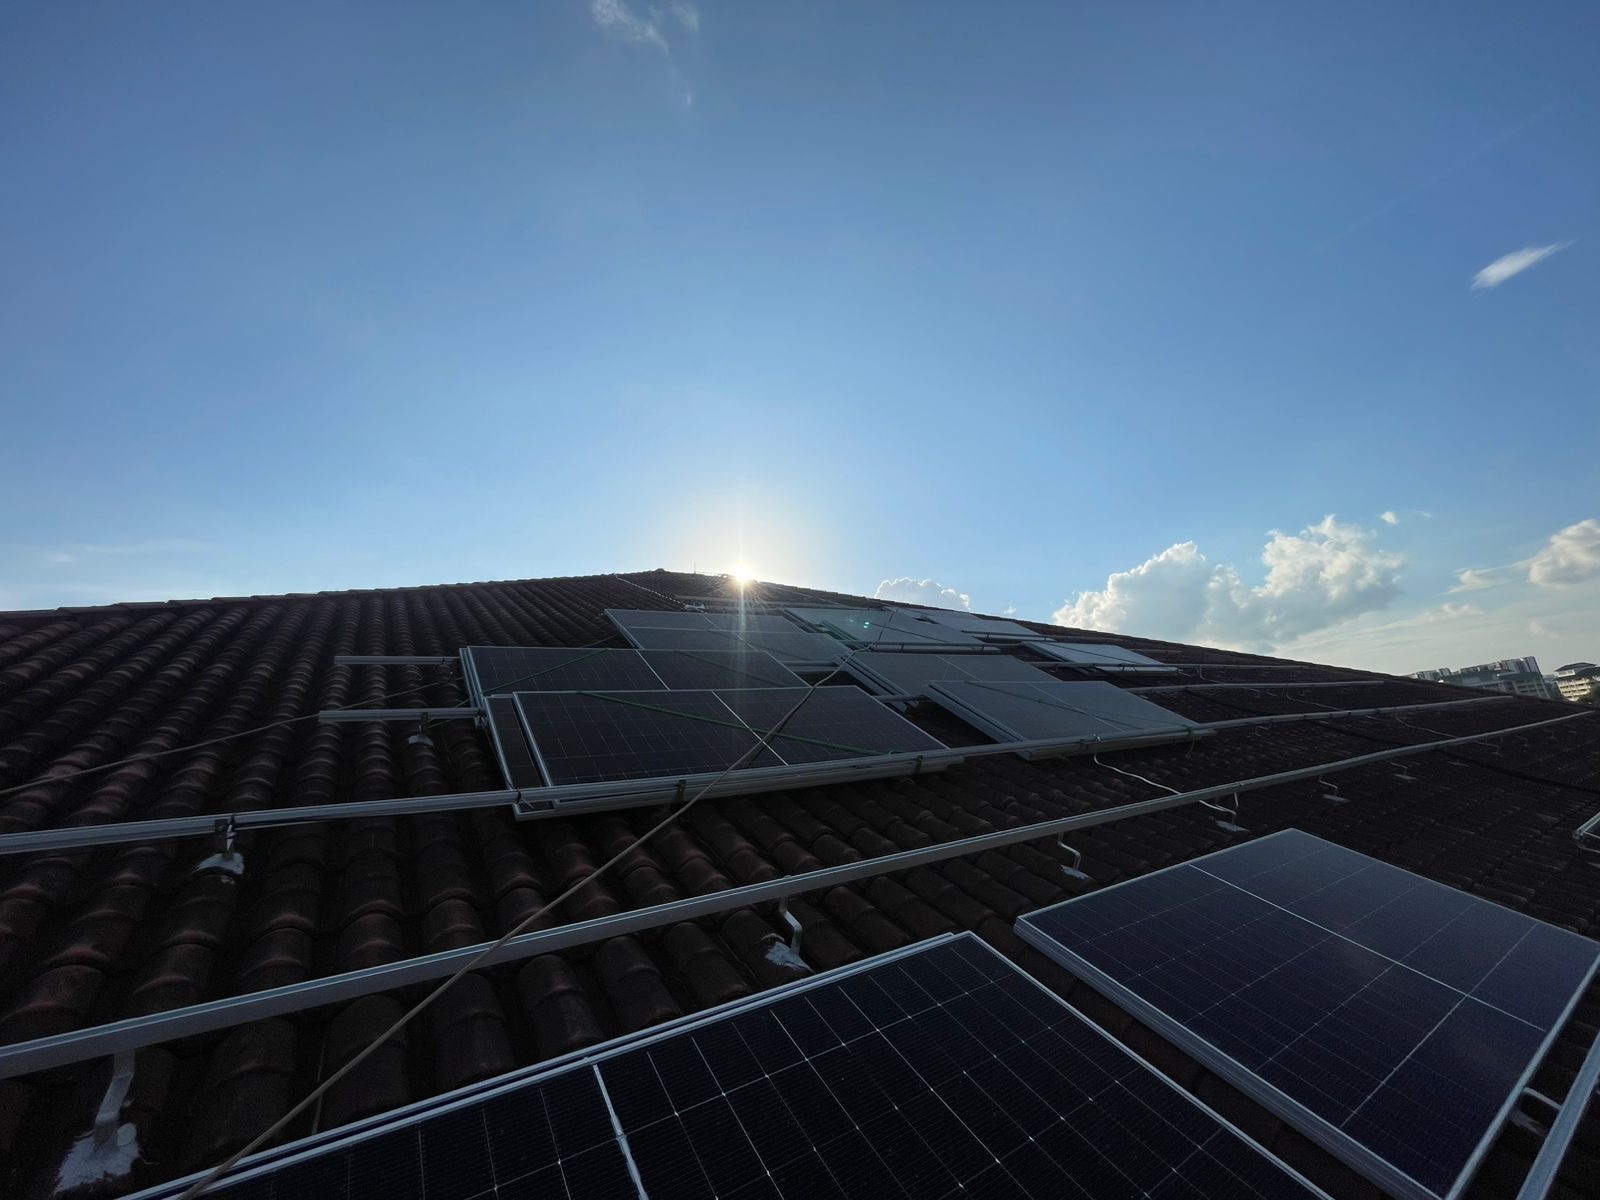
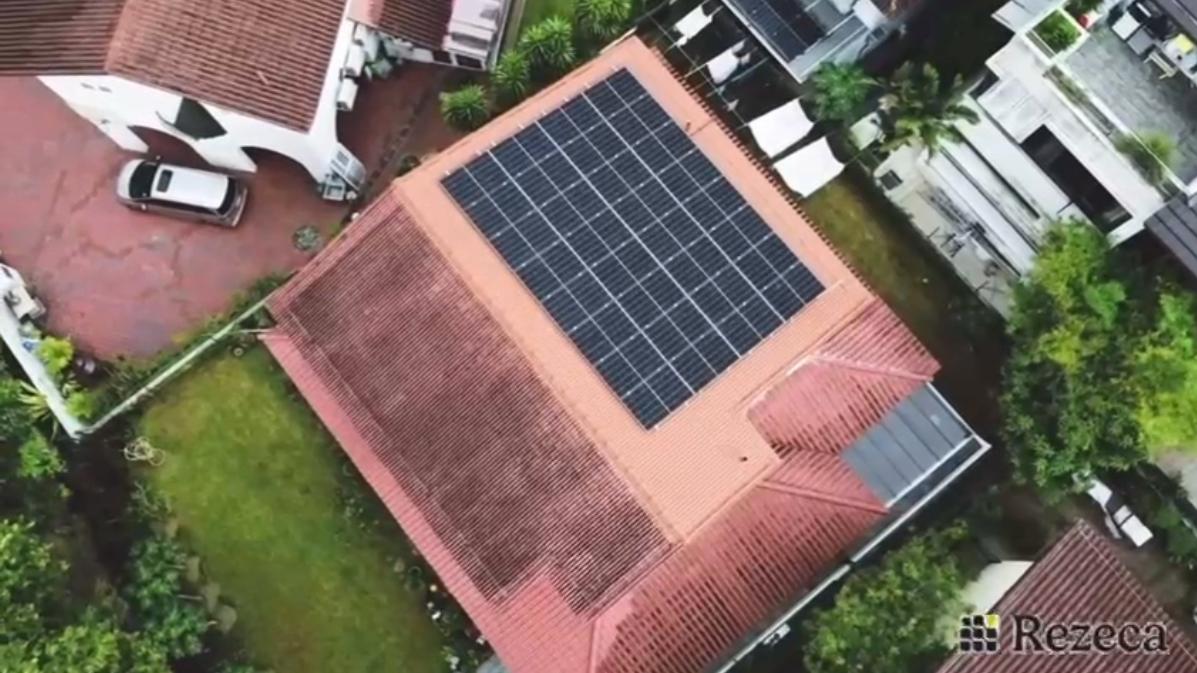
Step 4: Installation on the roof
The physical installation is the fast part. For most landed homes it takes from a few days to about two weeks, depending on system size and roof complexity. The typical sequence:
- Mounting system: rails, hooks or clamps fixed to your roof using the right method for tile, metal or concrete.
- Panels: modules mounted and secured to the rails.
- Electrical: inverter installed, DC and AC wiring run, isolators and surge protection fitted, system earthed.
- Tidy and check: cabling secured and the installation inspected before energising.
Your daily routine is barely affected; there is no need to move out, and power interruptions are brief and scheduled.
Step 5: SP Group inspection, metering and turn-on
Before the system can export to the grid, SP Group processes the application and installs or reconfigures the meter to record both import and export. This step, together with SP Group's scheduling, is the main reason the overall timeline runs to several weeks even though the rooftop work was quick. It is the utility's process, not the installer's, and an honest installer sets that expectation up front rather than promising a date they can't control.
Step 6: Commissioning and monitoring
With the meter in place, the LEW commissions and certifies the system, and it is switched on. You are set up with a monitoring app so you can see generation in real time, track savings, and spot any issue early. From here the system runs largely hands-off, with a professional clean roughly every six months to keep output up (see our maintenance guide).
The timeline at a glance
| Stage | Typical duration |
|---|---|
| Site survey + design + proposal | Around 1 week |
| Contract + LEW submissions to SP Group | Built into the SP wait |
| Installation on the roof | A few days to ~2 weeks |
| SP Group processing, metering and turn-on | The bulk of the wait |
| Installation start to full commissioning | Typically 4 to 12 weeks (SP-dependent) |
What the homeowner actually does
Across the whole process, your part is small: choose a reputable installer, approve the design, sign the contract, provide a recent SP Group bill and account details, and be available for the survey and the switch-on. The SP application, SCT registration, structural checks and any battery documentation are all handled for you.
Frequently asked questions
How long does it take to install solar panels in Singapore?
Typically 4 to 12 weeks from installation start to full commissioning. The rooftop installation itself is only a few days to about two weeks; most of the remaining time is SP Group's connection and metering process, which the installer does not control.
What is the process for installing solar on a landed home?
Six stages: a free site survey, a system design and proposal, contract and regulatory submissions by the installer's Licensed Electrical Worker, the physical rooftop installation, SP Group inspection and metering, then commissioning and switch-on with monitoring set up.
Do I need to be home or move out during installation?
No need to move out. You should be available for the initial survey and the switch-on, but the installation itself carries on with minimal disruption. Any power interruptions are brief and scheduled.
What do I need to provide to get solar installed?
A recent SP Group electricity bill and account details, approval of the system design, and a signed contract. Your installer's Licensed Electrical Worker handles the SP application and SCT registration on your behalf.
Who handles the approvals and paperwork?
Your installer, through its Licensed Electrical Worker. For a typical landed home the homeowner files nothing directly; the LEW submits to SP Group and registers SCT, with URA, BCA or SCDF involved only in specific cases.
Ready to see the process for your home?
Every install starts with a look at your actual roof. We are happy to walk you through exactly how it would work for your address, what you'd generate, and the honest timeline, no pressure, just the real picture.
Rezeca Renewables has installed solar for landed homes and businesses across Singapore since 2009, with over 1,500 installations and 45+ MWp to date, including 1,300+ residential landed homes.


All your solar questions, answered
Everything Singapore landed homeowners need to know about solar panel installation, costs, approvals, and returns.
Get Your Custom
Solar Plan
Prefer to chat? Tap the WhatsApp icon below to reach our team instantly.
Copyright © 2026 Rezeca Renewables.